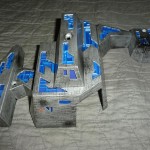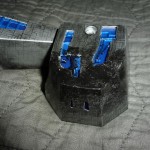
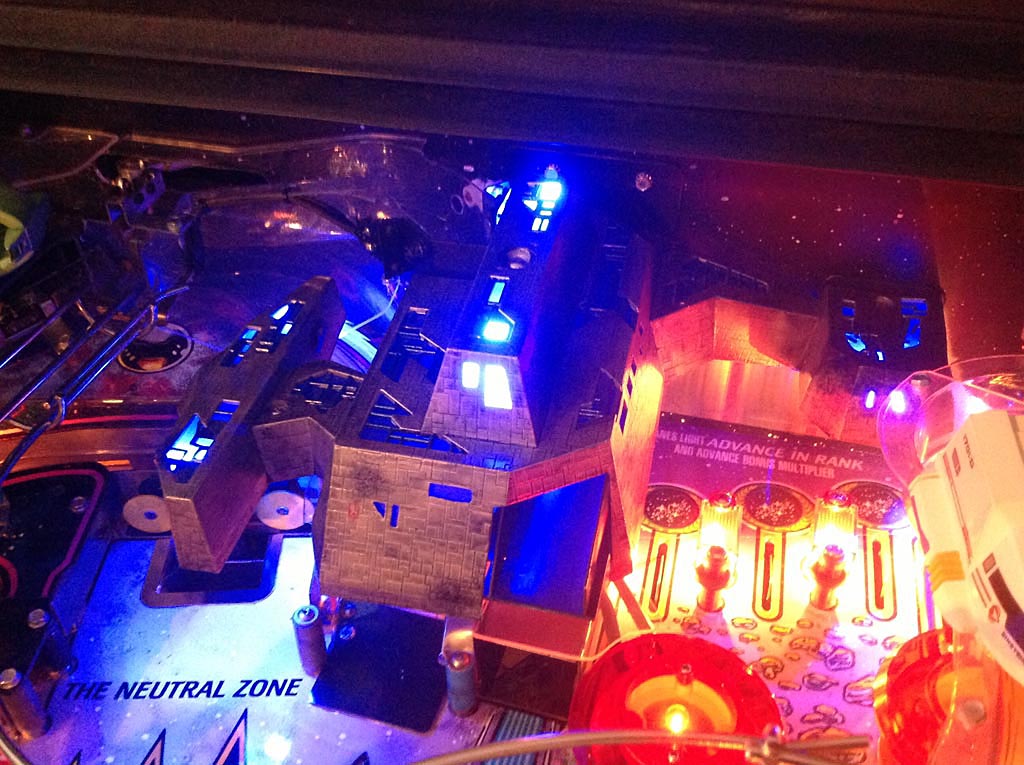
Recently, I was contacted by Treasure Cove who was in need of a painted Borg ship for one of their restorations. To speed things along, I shipped out one of my completed ships in exchange for a stock one. Before starting, I decided to take a different approach with this one and paint it to look battle tested. It turned out to be my best one yet.
Here’s an outline of the completed steps in case you want to try it yourself or basically so I can do it again sometime. The paints I used:
– Ship Base Color: Rust-Oleum American Accents satin metallics aluminum
– Base Blue: Testors acrylic gloss blue
– Blue Piping: Metallic blue (kinda sparkly)
– Silver Wash: Thinned Testors gloss silver enamel
– Black Wash: Thinned Testors gloss black
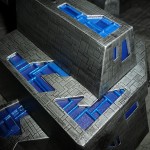
Painting steps after removing all those old plastic windows:
1. Paint ship with base color and let it dry a few days.
2. Paint Borg infected ship parts with base blue.
3. Paint piping with blue metallic.
4. Wash all blue parts with silver wash, except piping.
5. Wash silver ship base with black wash. Multiple passes needed to get the desired effect, but only one pass at a time and let dry or it will dissolve the base color. Mixing proper wash is tricky. Too light and nothing happens, too dark and it looks too bad. A perfect balance is needed to fill in all the cracks and make it look good.
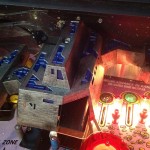
6. Added blast effects with straight from the bottle gloss black and a mid size brush. Add as needed. This is a great way to hide melted parts of the ship that has flasher bulb damage and make it look like it was supposed to be that way.
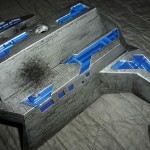
Replacing the Windows
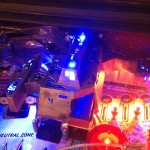
Now, I’ve made my own before and I’ve used the Pinbits window kit. This time, I went back to making my own out of a frosted blue plastic 3 ring binder folder. I think this looks best as it contrasts with the blue painting. It’s also easier to install the more flexible plastic than the rigid acrylic cut windows from Pinbits in areas that have melted flahser bulb damage. But, this is mostly a personal preference. They are glued in with a hot glue gun. Make sure to replace all the bulbs in the ship with blue LEDs. It looks better and there will be no more melting ship parts from standard flasher bulbs.
Conculsion
Well that’s about it. Now the ship looks tough and mean and ready for multiball. If you have the time and patience, give it a try. If not, I can do it for you. The cost for this service is $200 and takes about a 1-2 weeks after I receive it. Contact me if you want to do this.
-
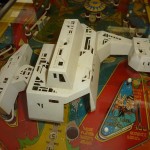
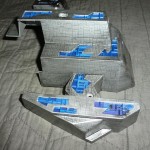
- Before
-
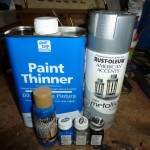
- Paints used.