This gallery contains 2 photos.
A few weeks ago I put on the first layer of clear coat. Since then, I finished leveling and sanding down all the inserts as there were many cracks around each one that needed to be filled in. Then I … Continue reading
This gallery contains 2 photos.
A few weeks ago I put on the first layer of clear coat. Since then, I finished leveling and sanding down all the inserts as there were many cracks around each one that needed to be filled in. Then I … Continue reading
This gallery contains 9 photos.
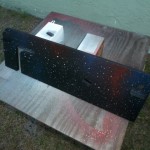
Yesterday, I finally got to test out my new spray gun from Lowes. It’s an SGY-AIR87 and costs under $50. It sprays very well despite the low price tag. I’ve tried cheap guns before (Harbor Freight & Wal-Mart/Coleman that all got … Continue reading
This gallery contains 7 photos.
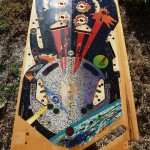
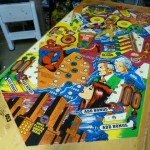
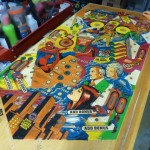
All the inserts are done. They were removed, flattened, then reinstalled. All touch up is done including repainting all the black lines around the inserts and fixing several wear marks. It’s now ready for the first layer of clear. Planning … Continue reading
This gallery contains 3 photos.
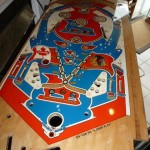
It cleaned up nicely just as anticipated. It was carefully cleaned with Magic Eraser, alcohol and Simple Green to remove any embedded dirt. Now on to the inserts.
This gallery contains 1 photo.
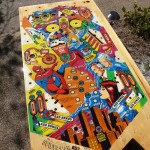
I just started the playfield restoration of a Gottlieb Amazing Spider-Man playfield. First thing’s first. I’ve got to clean it up. Then remove, flatten, and glue the inserts back in. Restore the shooter lane, touch up the playfield, then clear … Continue reading
This gallery contains 4 photos.
I filled the inserts on this one, sanded it, then buffed it out to a super shine. It had already been clear coated. I laid it on my Stern Lightning for a few photos so the reflections can be seen. … Continue reading
This gallery contains 1 photo.
Hey, if don’t like all the current decals available for your STTNG playfield back board and you want something different, then get creative! Grab some black, white, gold, red and blue spray paint and make a custom star field. It’s … Continue reading
This gallery contains 13 photos.
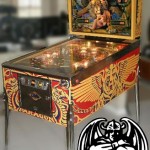
After many, many hours, it’s finished. Paragon got a full cabinet repaint, complete playfield restoration with automotive clear coat, rails and coin door polish, and a total rework of all circuit boards and mechanical parts. Also, every playfield part was … Continue reading
This gallery contains 8 photos.
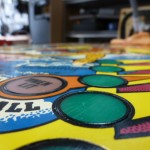
This playfield is finished. After 4 hours of sanding and buffing the final result is impressive. Sanding also makes the surface flatter for a better shine. Here’s the procedure I did for this one. 1. Wet Sand with 800 grit. … Continue reading
This gallery contains 37 photos.
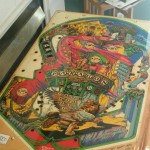
Finally!! After all the insert sanding, I finally put the last automotive clear coat on Paragon. It’s actually an additional 3 coats over the first 2. These pics are before any final sanding or buffing. It turned out extremely glossy.