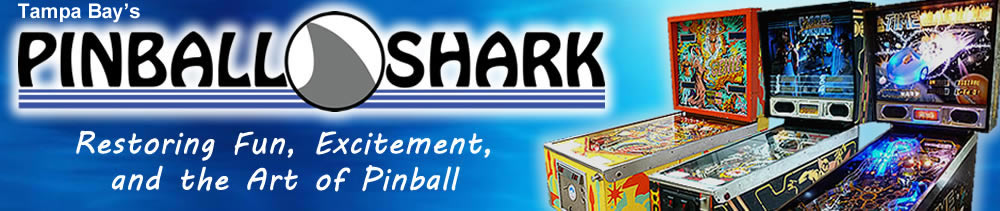
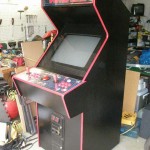
Yep, Pinball Sharks love video games, too. After a two week hiatus from working on pinball machines, I have finished this MAME cabinet for a friend. I started with a Dynamo cabinet that was converted to an Atari Surf Planet from 1997. The monitor didn’t turn on, but the cabainet had a nice wiring harness intact. I installed a 27″ TV and converted the old monitor frame to fit for a nice professional installation.
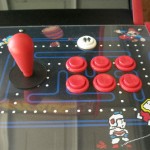
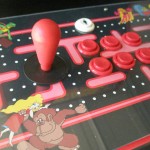
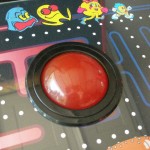
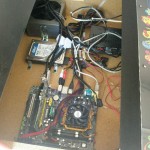
All new computer parts were used running Window Vista 64. Happ ultimate joysticks, Happ buttons, Ultimarc Ipac2 and Ultimarc Utrak 3″ trackball.
Audio amp is a Pyle PC1 and works great. http://www.amazon.com/Pyle-PCA1-15-Watt-Stereo-Amplifier/dp/B0012KZNP4/ref=sr_1_6?s=electronics&ie=UTF8&qid=1300462344&sr=1-6
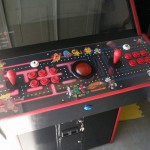
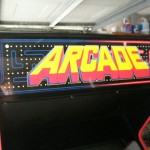
The marquee was found at arcadeartlibrary.com. I then took that graphic and removed the title and added some characters from various marquess and side arts for the control panel. Artwork was printed at Sam’s Club photo department.
One thing I’d like to mention is the t-molding, joysticks and buttons were ordered at twistedquarter.com. They have fast shipping and great service. My first order had the wrong size t-molding and ordered 4 way joysticks instead of 8. It’s the only order I screwed up in the whole project, but they were very helpful in swapping out the parts quickly. Thank you Twisted Quarter!
Front end software is GameEx. It’s an excellent front end I’ve been using for years, www.gameex.net. We added full artwork and video snapshots from emumovies.com for the menus.
See the pics below! First one is the cabinet when I first got it. Faded and ugly.
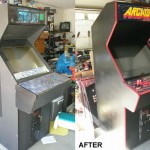
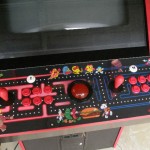
 The old control panel was thrown out and a new one was built. This took some time, but the end result is excellent. 3/4″ MDF was used with a clear sheet of lexan on top. On the front, all screws for the joysticks and trackball were recessed t-nuts for a clean look. On the back, the trackball area had to be counter sunk so it cleared the extra thickness of the lexan on the front. Once that was done, the trackball retaining ring hides the cut out hole for a clean look, again. The only screws shown on the panel are for the lexan. Stainless steel hex bolts were used.
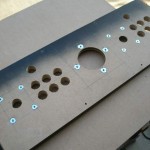
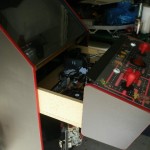
This Dynamo cabinet has a pretty cool design. All the internals reside in a drawer and slides out for service. I mounted all the PC parts in there, including the amp and power supply. It could be completely unhooked and removed for service off-site.
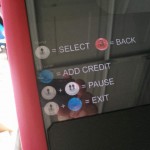
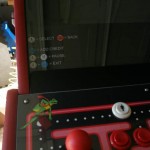
I made a cheat sheet card for the monitor bezel to help users with navigating the menus and using in game commands.
Here’s the marquee and cabinet. Fluorescent bulbs were used in the marquee replaced the incandescent bulbs.
I busted this out in two weeks from start to finish and the project turned out great. This thing will give many years of gaming bliss to all who play it.

Is this for sale? I’m in Lutz and would be interesting in possibly buying this beauty.
That one is sold and I have been focusing on pinball ever since.